As an Amazon Associate I earn from qualifying purchases.
If you’ve been wondering how to clean a gas oven with a pilot light safely, you’re not alone. These older-style ovens are still found in many homes across the U.S. and U.K., especially in vintage apartments or older rental properties. But unlike modern ovens with electronic ignition systems, cleaning one with a pilot light requires extra care—both for safety and performance.
In this guide, we’ll walk you through what a pilot light is, how it works, and why it matters when it comes to cleaning your oven. Whether your gas stove pilot light is always on or it keeps going out, understanding how it functions is the first step in keeping your oven running efficiently—and your kitchen safe.
Let’s start with the basics.
How a Pilot Light Works
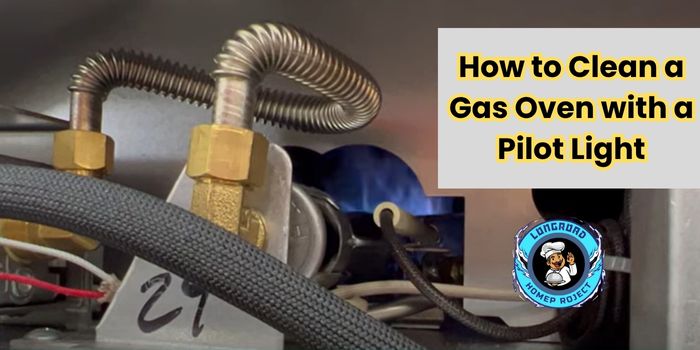
A pilot light is a small, constantly burning flame that ignites the main burner when you turn on your oven. It’s usually located near the oven burner or behind a small metal shield inside the oven cavity. The flame stays lit 24/7 (unless it goes out) and is fueled by a tiny stream of gas.
When you turn the oven knob to heat, the gas valve opens, and the pilot flame lights the gas in the burner—heating your oven to the desired temperature. Think of it as an old-school ignition system—always ready to spark the heat.
Why Some Ovens Still Use Pilot Lights Today
Even though many ovens today use electronic ignition, pilot lights are still around—especially in older models or homes that haven’t upgraded. Why? Because they’re simple, reliable, and don’t depend on electricity. In fact, during power outages, ovens with pilot lights can still be used, which is a big plus in some households.
Some people also prefer pilot light ovens for their straightforward design—no electronics to fail, no fancy control panels to break. They do, however, require manual cleaning and careful upkeep, particularly around the burners and jets, where grease can build up and block gas flow.
Signs Your Oven Has a Pilot Light (vs. Electronic Ignition)
Not sure what kind of ignition your oven uses? Here’s how to tell:
- You see a small blue flame inside the oven cavity, even when it’s turned off.
- Your oven has no clicking sound when you turn the knob (electronic ignition ovens usually “click” to light).
- There’s no electric plug or digital control panel on the oven itself.
- The manual mentions “pilot” or has instructions for relighting the pilot flame.
Knowing whether your oven has a pilot light is essential before you start cleaning—because cleaning near a live flame carries some risks if not done properly.
Safety First – Preparing to Clean Your Gas Oven
Before you even grab a sponge or cleaner, let’s talk safety. Cleaning a gas oven that uses a pilot light isn’t quite the same as scrubbing down a modern electric model. Because the flame is always on, working around it demands caution, proper gear, and smart prep. Let’s go through the essentials to keep you safe while making your oven shine.
Should You Turn Off the Pilot Light Before Cleaning?
Short answer: Not always—but it depends on what you’re cleaning.
If you’re doing a deep clean inside the oven, especially near the burner or flame area, it’s a good idea to turn off the gas supply and relight the pilot afterward. That way, you eliminate any risk of flammable fumes igniting.
However, if you’re doing a surface-level clean (like wiping down oven walls or racks), you can leave the pilot light on as long as you’re using non-toxic, non-flammable cleaners and staying clear of the burner zone.
💡 Pro Tip: If you’re unsure, always turn off the gas valve feeding your oven. Most gas lines have a shut-off lever nearby. Once off, the pilot light will go out on its own in a few minutes. Just make sure you know how to relight the pilot when you’re done (more on that later in this guide).
Safety Gear Checklist
Before you get started, gather the right tools to protect yourself and your kitchen:
- ✅ Rubber gloves – Essential for keeping hands safe from grime, grease, and cleaning solutions.
- ✅ Safety goggles – Prevent any cleaner splashes from irritating your eyes.
- ✅ Non-toxic oven cleaner – Look for fume-free, biodegradable options labeled safe for use near gas appliances.
- ✅ Old towels or rags – For wiping up excess moisture and cleaner residue.
- ✅ Scrub brush or sponge – Avoid anything metal or abrasive that could damage gas jets or thermocouples.
- ✅ Flashlight – Helps you see inside dim corners of the oven, especially around the pilot light.
These basics make cleaning both easier and safer, especially when working close to flame sources.
Ventilation and Kitchen Prep Tips
Cleaning products—even the non-toxic ones—can release vapors when used in a warm oven space. That’s why good ventilation is critical.
Here’s how to prepare your space:
- 🔹 Open all windows in the kitchen.
- 🔹 Turn on your exhaust fan or hood vent (if available).
- 🔹 Keep pets and kids out of the kitchen while cleaning.
- 🔹 Remove oven racks, trays, and any pans stored inside.
- 🔹 Lay down an old towel or drop cloth around the oven to catch drips and grime.
And if your oven is located in a small apartment kitchen, even cleaning vinegar and baking soda can smell strong in tight spaces. Always err on the side of caution and keep air flowing.

How to Clean a Gas Oven with a Pilot Light
Cleaning a gas oven with a pilot light may sound intimidating, but with the right supplies and method, it’s totally doable—even for first-timers. The key is being gentle around the flame area, using non-toxic cleaners, and working methodically to avoid disrupting the pilot system. Let’s walk through the full process, step by step.
Supplies You’ll Need
Before you dive in, gather your materials. Having everything ready makes the cleaning smoother and safer.
Here’s your cleaning toolkit:
- 🧼 Non-toxic oven cleaner (baking soda + vinegar or a plant-based product)
- 🧽 Sponge or soft scrub brush
- 🧻 Paper towels or microfiber cloths
- 🧤 Rubber gloves
- 🕯️ Flashlight (to see around the pilot flame)
- 🪣 Bucket of warm water
- 🪟 Old towel or drop cloth (to protect your floor)
- 🚪 Oven-safe mask or fan (if needed for ventilation)
Remove Oven Racks and Trays
Start by removing everything inside the oven:
- Pull out oven racks, trays, and any crumb-catching liners.
- Soak these in warm, soapy water or a mixture of vinegar and water in your sink or a large tub.
- Let them sit while you tackle the oven interior.
💡 Tip: For tough grease on racks, sprinkle baking soda on them, spritz with vinegar, and let them fizz for 10–15 minutes before scrubbing.
Clean the Oven Interior Without Extinguishing the Pilot
Here’s where you need to be cautious. The pilot light is usually located at the bottom rear or center of the oven. It’s a small, steady blue flame that shouldn’t be disturbed.
- Avoid spraying cleaners directly at or near the flame.
- Use a damp cloth or sponge, not dripping wet, to prevent liquid from extinguishing the flame or damaging gas parts.
- Focus on the walls, floor, and roof of the oven cavity first, staying clear of the pilot for now.
For a homemade cleaner:
- Mix ½ cup of baking soda with a few tablespoons of water to make a spreadable paste.
- Apply to greasy spots and let sit for 15–30 minutes.
- Wipe off with a damp cloth, rinsing frequently.
Target Grime and Baked-On Grease
Some areas, especially the oven floor, can build up layers of baked-on spills. Here’s how to safely remove them:
- Apply the baking soda paste generously over grimy spots.
- Mist lightly with white vinegar to activate the fizzing reaction.
- Let it sit for at least 30 minutes (or overnight for heavy buildup).
- Scrub gently with a non-scratch brush or sponge.
Avoid using harsh scrapers, which could damage the gas jets or oven lining.
Clean Around the Pilot Flame Area Safely
Now comes the delicate part—cleaning near the pilot light:
- Turn off the oven and allow the area around the flame to cool completely.
- Use a dry or lightly damp cloth to clean grime near the flame area.
- If there’s any buildup around the thermocouple or pilot port, use a soft brush (like an old toothbrush) to dislodge it—never use water directly near the flame.
⚠️ DO NOT spray any cleaner around the pilot flame. This can extinguish the flame and even pose a fire risk.
If the flame goes out accidentally:
- Turn off the gas valve.
- Ventilate the kitchen.
- Wait several minutes before attempting to relight the pilot (refer to your oven’s manual).
Rinse & Dry
- Once the grime is gone, use a clean damp cloth to wipe all interior surfaces.
- Follow up with a dry towel or paper towel to remove residual moisture.
- Ensure everything is completely dry, especially near the gas components.
Reassemble After Cleaning
- Retrieve your clean oven racks and trays, dry them fully, and slide them back into place.
- Check that the pilot flame is still burning steadily.
- Turn your oven on briefly to ensure all systems are working normally.
Tip: Keep a weekly wipe-down routine to prevent future buildup and extend the time between deep cleans.
With this method, you’ve deep-cleaned your gas oven safely—without ever compromising your pilot light. It’s all about patience, smart technique, and knowing when to be extra cautious.
How to Clean Gas Oven Jets and Burners
Keeping your gas oven’s jets and burners clean isn’t just about hygiene—it’s essential for safety, performance, and energy efficiency. Dirty or clogged jets can cause uneven heating, slow cooking, and even gas leaks. Here’s how to keep them in top shape:
Why Clean the Gas Jets and Burners Regularly?
Over time, food particles, grease, and dust can build up in your oven’s gas jets and burners. This buildup restricts gas flow, causing:
- Uneven flames or weak burner output
- Difficulty lighting the oven or stove
- Wasted energy and longer cook times
- Unpleasant odors due to burning debris
Regular cleaning—every few months or more often if you cook frequently—prevents these problems and helps your appliance last longer.
How to Clean Gas Oven Jets Step-by-Step
Here’s a safe and effective way to clean the gas jets in your oven:
- Turn Off the Gas Supply
For safety, always shut off the gas valve before cleaning. Wait until the oven and burners are completely cool. - Remove Burner Caps and Grates
Gently lift off the burner grates and caps. Soak them in warm, soapy water while you clean the jets. - Access the Jets
Use a small screwdriver to remove the metal burner base (if needed). This will expose the tiny holes (jets or orifices) where gas flows through. - Clean the Jets Carefully
- Use a soft brush or old toothbrush to remove surface debris.
- Insert a straight pin or sewing needle into the tiny jet holes to clear clogs. Don’t enlarge the hole—just clear any blockage.
- Compressed air (optional) can also blow out stubborn debris.
- Wipe Surrounding Area
Use a damp cloth to clean around the burner area. Avoid letting water enter the gas lines or jet holes. - Soak and Scrub Burner Caps
Scrub the burner caps and grates you soaked earlier. Rinse and dry thoroughly. - Reassemble Components
Put everything back together in the correct order. Make sure all parts are fully dry before turning the gas back on.
Avoiding Clogs or Uneven Heating
- Never pour liquids directly into the burners. Use controlled sprays or damp cloths.
- Wipe spills immediately. Don’t let food sit and harden around burners.
- Use baking soda and vinegar paste for stubborn grime—but avoid abrasive pads that could damage components.
- Regularly check burner flame color. A healthy flame should be steady and blue. Yellow or flickering flames may signal blockages.
Reigniting the Pilot Light if It Goes Out
Sometimes during cleaning, the pilot light can go out. Here’s how to safely relight it:
- Turn off the oven and gas supply.
- Wait 5–10 minutes for any remaining gas to dissipate.
- Turn the gas back on.
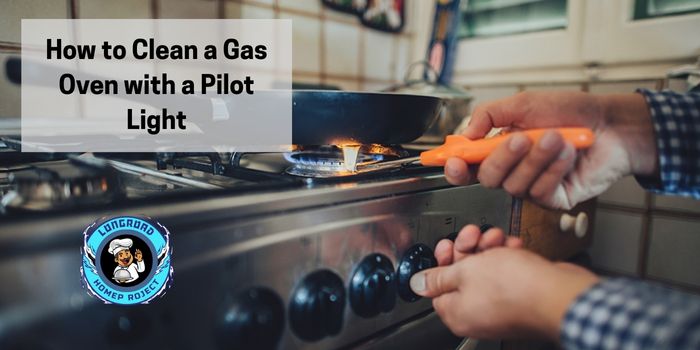
- Use a long lighter or matchstick to relight the pilot flame, following your oven’s manual instructions.
- Observe the flame. It should be small and steady. If it flickers or doesn’t stay lit, you may need to clean the thermocouple or consult a technician.

What If the Pilot Light Keeps Going Out?
A flickering or extinguished pilot light isn’t just annoying—it can be a safety concern and may disrupt your cooking plans. Here’s what might be going wrong and how to troubleshoot it safely.
🔸 Common Causes and Solutions
If your pilot light keeps going out, there could be several culprits:
- Dirty or clogged pilot orifice: Grease, dust, or food debris can block the gas flow. Cleaning it with a fine needle or brush may help.
- Faulty thermocouple: This safety device senses heat from the pilot light. If it’s broken or misaligned, it may cut off the gas supply.
- Gas pressure issues: Low gas pressure or inconsistent supply can cause an unstable flame.
- Drafts or airflow problems: An open window, strong exhaust fan, or a poorly sealed oven door can blow out the flame.
✅ Solution: Clean the area, check for airflow disruptions, and ensure the thermocouple is close enough to the flame (usually about 1/4 inch).
Stove Pilot Light Keeps Going Out – What It Means
If this issue happens repeatedly, it’s often a sign that your gas oven needs maintenance. It could indicate aging parts, soot buildup, or even issues with your home’s gas supply.
You should observe the color and stability of the flame:
- Blue and steady = normal.
- Yellow, flickering, or weak = needs inspection or cleaning.
When to Call a Professional
Don’t risk DIY fixes if:
- You smell gas.
- You’ve cleaned and checked components, but the problem persists.
- You suspect a faulty gas valve or deeper mechanical issue.
🛠️ A certified gas technician can inspect your oven safely and may recommend part replacements or adjustments.
Pilot Flame Adjustment Tips
If your pilot flame is too low or too strong:
- Locate the pilot adjustment screw (usually behind the control panel or near the burner base).
- Turn clockwise to reduce the flame.
- Turn counterclockwise to increase the flame.
Be cautious! Always refer to your oven’s manual, and never adjust the flame while it’s on unless your model allows it.
Is It Normal for the Gas Stove Pilot Light to Always Be On?
Yes—if your stove uses a standing pilot system, it’s designed to stay lit 24/7.
🔸 How Standing Pilot Lights Work
In older gas ovens, a small flame burns continuously to ignite the main burner when you turn on the oven. It’s a standard setup and not dangerous if properly maintained.
Energy Usage Facts
While standing pilots do use a small amount of gas:
- It’s typically less than $10–$20/year in energy cost.
- Some modern stoves have electric ignition systems instead to reduce gas consumption.
When It’s a Concern and When It’s Normal
It’s normal if:
- The flame is steady and blue.
- There’s no gas smell.
- Your oven lights reliably.
It’s a concern if:
- You hear gas hissing but no flame.
- The flame flickers, turns yellow, or keeps going out.
- You smell gas even when the oven is off.
When in doubt, shut off the gas supply and call a professional.
Maintenance Tips to Keep Your Gas Oven Clean & Safe
Cleaning your gas oven regularly not only keeps your kitchen smelling fresh but also ensures your oven runs safely and efficiently. Here are some essential maintenance tips to help you stay ahead of grime, grease, and potential issues—especially when you’re working with a gas oven that has a pilot light.
🔸 Weekly Wipe-Down Routines
One of the easiest ways to avoid a deep-cleaning nightmare is to wipe down your oven weekly:
- After cooking (once the oven is cool), use a damp cloth or sponge with a bit of mild soap.
- Pay attention to spills on the oven floor, near the burners, and on the racks.
- Wipe away crumbs around the pilot light area, but avoid direct contact with the flame.
A quick five-minute cleanup can go a long way toward preventing stuck-on messes that require heavy-duty scrubbing later.
How to Prevent Food Spills from Becoming Baked-On Messes
Food spillage is a major cause of smoke, bad odors, and even uneven cooking. Here’s how to prevent those messes:
- Use baking trays or oven-safe liners beneath dishes that may bubble over (e.g., lasagna, roasts).
- Cover casseroles or pies with foil to avoid overflow.
- If a spill does happen, clean it as soon as the oven cools to prevent it from hardening.
💡 Tip: Always place a catch tray a few inches below the main dish—not directly on the oven floor or pilot light zone.
When to Do a Deep Clean
Depending on how often you use your oven, a deep clean every 1 to 3 months is ideal:
- If your oven smells when preheating or smokes during use, it’s time.
- Regular baking or roasting? Consider cleaning monthly.
- Light use? Every 2–3 months might suffice.
During deep cleans, take out the racks, clean the interior walls and floor, and check for buildup near the burners and pilot.
Annual Inspection Advice
Once a year, give your oven a more thorough check—or better yet, have it professionally serviced:
- Inspect burner flame patterns for yellow tipping or irregular shapes.
- Look at gas lines and connectors for wear or corrosion.
- Test your thermocouple and safety valves, especially if your pilot light goes out frequently.
Annual checkups keep your gas oven in peak condition and help prevent unexpected failures or safety issues.

FAQs
How do I clean a gas oven with a pilot light without turning it off?
✅ Use non-flammable, non-corrosive cleaners and avoid spraying directly near the pilot flame. Gently wipe around the flame using a damp cloth with mild detergent.
How to clean gas stove jets effectively?
✅ Remove the jets and soak them in white vinegar. After soaking, scrub gently with a toothbrush or soft wire brush to clear away soot and grease.
Why does my pilot light keep going out on the stove?
✅ The most common reasons include a dirty thermocouple, blockage in the burner, or strong airflow that disrupts the flame. A faulty gas valve could also be the cause.
Is it safe to leave the pilot light on all the time?
✅ Yes. If the flame is blue, steady, and small, it’s completely safe. It’s designed to stay on 24/7 in standing pilot systems.
How often should I clean my gas oven?
✅ Aim for a light cleaning every 1–3 months, depending on usage. Wipe spills immediately and deep-clean every quarter for best results.
Conclusion
Cleaning a gas oven with a pilot light might seem intimidating at first, but once you get the hang of it, it’s surprisingly simple. Remember the golden rule: a little regular maintenance prevents big messes later.
When you know how to clean a gas oven with pilot light safely, you’re not only improving your cooking experience—you’re also extending the life of your appliance and protecting your household.
My personal routine includes a weekly wipe-down, a monthly deeper scrub, and an annual safety check. It takes less time than you’d think and helps avoid performance issues, odors, or safety risks.
So go ahead—clean confidently, cook safely, and enjoy that oven-fresh magic!
As an Amazon Associate I earn from qualifying purchases.
